Step 11 - Optional NGINX Plus Ingress Controller Deployment
This step is optional, the ingress controller has already been deployed to save time and focus on the items that are specific to configuring NGINX App Protect.
That said, if you are interested in the topology or deploying the ingress controller, please continue on with this step. Otherwise you can skip to module 5: protecting API workloads.
The previous exercises were designed to show what is possible and give examples of how to configure NAP. Using these principles, we can move our NAP configurations to Kubernetes.
In this step, instead of using a VM or docker container with NGINX App Protect to proxy to a NodePort on our cluster, we will deploy the NGINX Kubernetes Ingress Controller (KIC) which will proxy to a ClusterIP of the Arcadia services. A ClusterIP is only accessible internally to the cluster. By using the ClusterIP, we force all requests to go through the KIC.
Generally, we would deploy the ingress controller behind a L4/L7 load balancer to spread the load to all of the ingress controller PODs, as depicted on the right side of this image. In this lab, we will target the KIC Service NodePort directly with our browser (without the L4 LB/LTM in red).

At a high-level we will:
Use helm to deploy the Ingress controller that has been saved to the registry running on our docker host
Deploy a new “ingress configuration” using a Custom Resource Definition (CRD) specifically created by NGINX to extend the basic capability of the standard Kubernetes “Ingress” resource. This “VirtualServer” will tell the KIC pods to create the configuration necessary to access and protect our applications.
Note
This is a single node cluster and we are using “hostNetwork” to allow the ingress controller to listen on 80 and 443.
Steps
SSH to the rancher VM
This is the contents of the
/home/ubuntu/lab-files/helm/values-plus-with-app-protect.yamlfile:values-plus-with-app-protect.yamlcontroller: nginxplus: true image: repository: docker.udf.nginx.rocks/nginx-plus-ingress tag: 2.0.3-ubi-nap setAsDefaultIngress: true ingressClass: nginx enableCustomResources: true enablePreviewPolicies: true enableSnippets: true appprotect: ## Enable the App Protect module in the Ingress Controller. enable: true healthStatus: true enableLatencyMetrics: true nginxStatus: ## Enable the NGINX stub_status, or the NGINX Plus API. enable: true port: 8080 ## Add IPv4 IP/CIDR blocks to the allow list for the NGINX Plus API. Separate multiple IP/CIDR by commas. allowCidrs: "0.0.0.0/0" # for our single node cluster, we can listen on 80 and 443 via hostNetwork: hostNetwork: true service: type: NodePort externalTrafficPolicy: Cluster extraLabels: # needs to match ServiceMonitor matchLabels app: nginx-ingress-controller httpPort: enable: true port: 80 nodePort: 30274 targetPort: 80 httpsPort: enable: true port: 443 nodePort: 30275 targetPort: 443 customPorts: - name: dashboard targetPort: 8080 protocol: TCP port: 8080 nodePort: 30080 - name: prometheus targetPort: 9113 protocol: TCP port: 9113 nodePort: 30113 config: entries: # resolver-addresses: kube-dns.kube-system.svc.cluster.local http2: "true" resolver-valid: 5s # smarter LB method: lb-method: "least_time last_byte" # for debugging error-log-level: info # plus logging: log-format: |- $remote_addr - $remote_user [$time_local] "$request" $status $body_bytes_sent "$http_referer" "$http_user_agent" "$http_x_forwarded_for" "$Host" rn="$resource_name" "$resource_type" "$resource_namespace" svc="$service" "$request_id" rt=“$request_time” ua=“$upstream_addr” uct="$upstream_connect_time" uht="$upstream_header_time" urt="$upstream_response_time" uqt=“$upstream_queue_time“ cs=“$upstream_cache_status“ prometheus: create: true scheme: http port: 9113Note
Helm is a utility that allows application developers to package their application and settings in a collection. We then use a values.yaml file to set values specific to our deployment.
To remove the existing ingress controller:
helm removalhelm uninstall plus -n nginx-ingressRun the following commands to install the NGINX Plus KIC helm chart:
helm installhelm repo add nginx-stable https://helm.nginx.com/stable helm repo update helm install plus nginx-stable/nginx-ingress -f /home/ubuntu/lab-files/helm/values-plus-with-app-protect.yaml --namespace nginx-ingress --create-namespaceAfter running the command, we need to wait for the KIC pod to become available. you can use a command like:
kubectl get pods --all-namespaces --watchOnce it we have 1/1
plus-nginx-ingressready. You can pressctrl-cto stop the watch.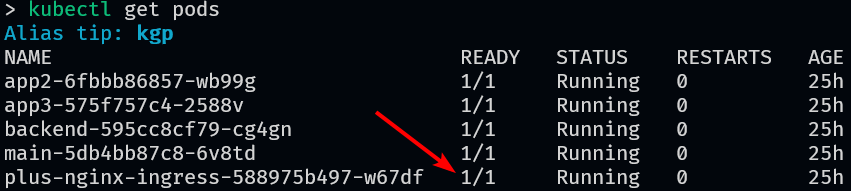
Note
Tab completion is enabled for all commands. In the command below, press tab at the end to complete the name of the pod.
View the logs, you will notice that they are similar to previous lab exercises with additional logs regarding the Kubernetes environment.
kubectl logs --follow -n nginx-ingress plus-nginx-ingress-